Moneris Checkout Setup in Moneris portal and eRATEX
We’ve put together these instructions to help you implement Moneris Checkout. We recommend that you consult with Moneris support if you have any questions.
Go to your Moneris account and login.
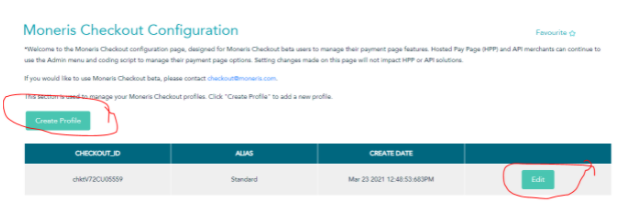
Under the Admin Menu in your Moneris account, choose Moneris Checkout Configuration (fourth item from the top).
If you have not started an MCO Profile, click on Create Profile, if you have started, select the Edit button on the existing profile.
The screen will open to Checkout Type. Select the second option: I have my custom order form…
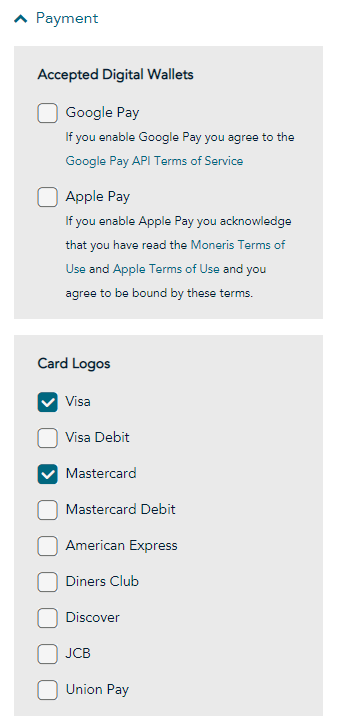
Expand the Payment Options menu.
Ignore Google Pay and Apple Pay, they are not currently configured in eRATEX
Select the card logos you wish to accept
We are uncertain whether you need to check Visa Debit & MC Debit to process debit card transactions (they would go through as credit card transactions)
Please confirm with your Moneris contact
We recommend that you leave them blank until then
Select 3D Secure in Payment Security if that is included in your Moneris contract
Under Transaction Type select Card Verification and Tokenize Card
Ignore Transaction Limits
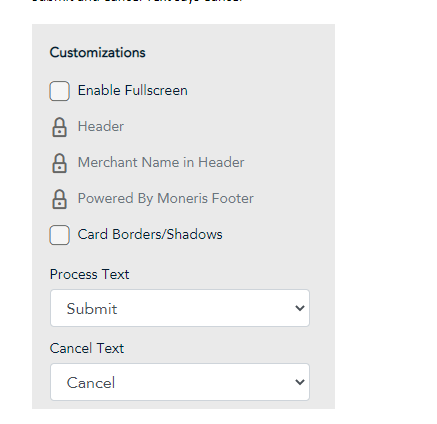
Under Branding and Design make sure Enable Fullscreen is not selected and that Process Text says Submit and Cancel Text says Cancel
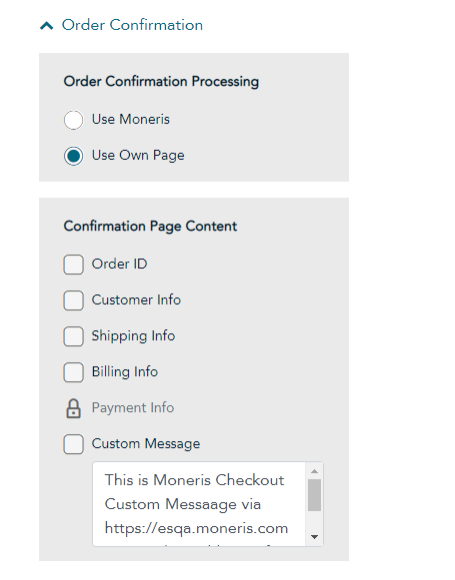
Under Order Confirmation select Use Own Page. The other settings will be ignored by choosing that option. You can leave them as they are or uncheck all.
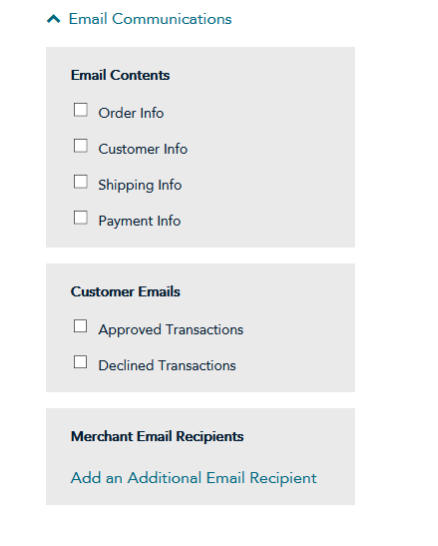
Email Communications can left as is but we recommend that you uncheck them. Customer will receive confirmation emails from eRATEX.
That should complete your Moneris Checkout Configuration.
Be sure to click Save before leaving the page!
To configure eRATEX for Moneris Checkout you will need three values
The Checkout ID from the Moneris Checkout Configuration Page
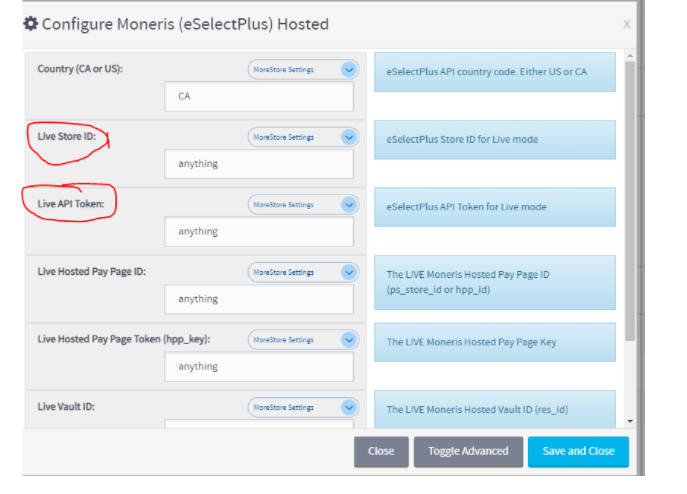
You can use your current store ID (copy from your current Moneris Hosted configuration)
You can use your current API Key (copy from your current Moneris Hosted configuration)
From the eRATEX Admin Menu select Configuration/Payment Methods and scroll down to Payment Processing Solutions.
Select Configure for Moneris Hosted to copy the existing store and API values.
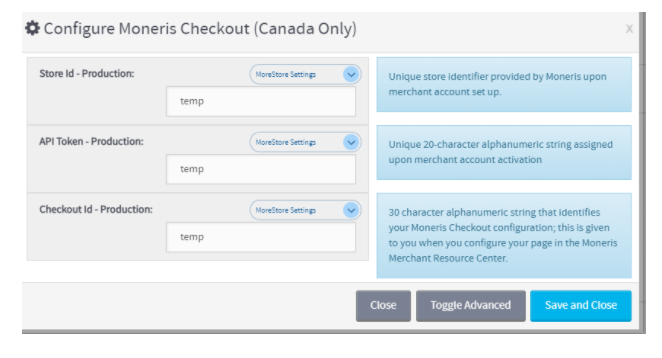
Close and then select the radio button then configuration for Moneris Checkout (don’t select test mode).
Fill in the pop up box with the Store ID and API Token you copied from your current configuration and add the Checkout ID you copied from your Moneris Vault Configuration. Then click Save and Close.
Be sure to scroll up or down on the screen and hit the Save button before you exit.
You should now be able to test an order on your site. We recommend that you process the order through to close in VR Order Fulfillment to make sure funds have been captured. The transaction can then be refunded at POS.
If you have a maintenance page up you can remove it by going to Admin/Settings and filter onDisplayMaintenancePage.Enable. Change the setting to False, then click Save and Close.
Once you have confirmed that Moneris Checkout is fully functional, we recommend that you delete all Hosted Vault Configurations on the Moneris site. This will prevent any potential abuse of those credentials.
In the Moneris portal, go to Vault/Hosted Vault Config and delete all configurations.


 Email This Article
 Previous Article
 Next Article