Recurring products are repeatedly ordered products which have a specified order frequency.
This article addresses the set up of recurring products, and management of recurring orders MANUALLY in the cart admin. Auto Recurring billing is supported by Authorize.net, PayPal Payflow Pro, and PayPal Payments Advanced payment gateways, which allow processing automatically within the gateway (extra cost services, please check with your gateway for details). Please review this article for more information about configuring your gateway for auto recurring payments.
Creating Recurring Products
From the Admin Console, navigate to Manage Catalog > Products and select a product you'd like customers to order on a recurring basis. You can also click Add New Product to create a new product.
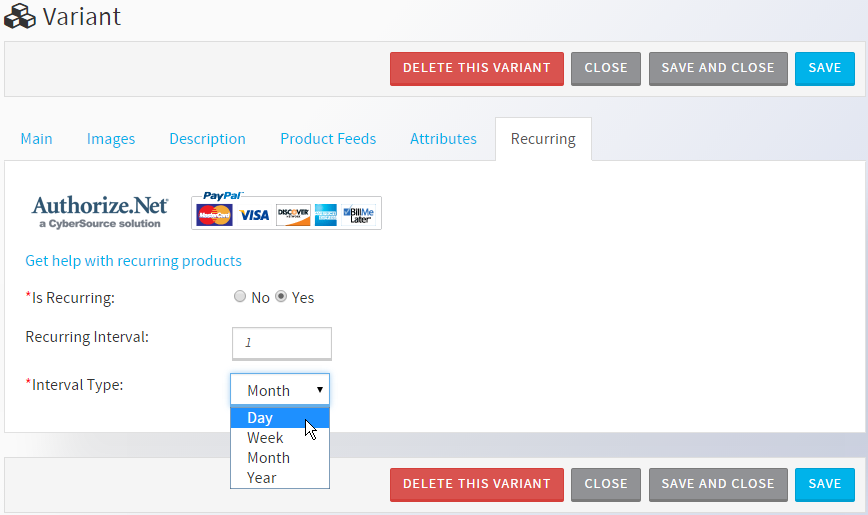
Click Manage Variants, then select a Variant name to edit the Variant.
Select the Recurring tab, and set Is Recurring radio button to Yes, then set a Recurring Interval & Interval Type from the options in the dropdown menu, then click Save.
NOTE: A Kit Product cannot be a Recurring Product.
Each variant can only have a single interval type, so if you offer varying intervals such as DAILY, WEEKLY, MONTHLY for the product, you will need to make 3 variants. Set the NAME of the variant as the interval value (or at least include it in the name). This is especially important if you enable the Configuration - Settings - AllowRecurringFrequencyChangeInCart, which allows the customer to change the selected interval of the product on the shopping cart page, which selects a different variant.
Viewing/Editing Recurring Orders
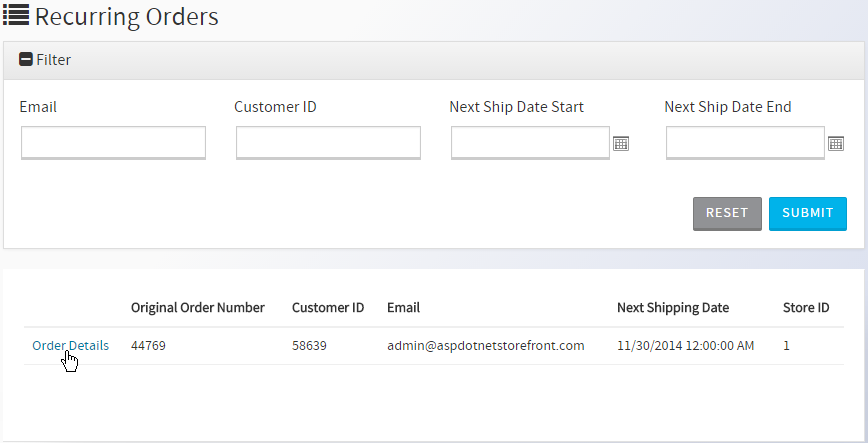
From the Admin Console, navigate to Recurring Orders > Recurring Shipments
Use the available filters to locate a recurring order, then click Order Details for more information about each order.
On the Order Details page, you can edit the next shipment date by changing the date in the Next Ship Date field. You can also adjust the Recurring Interval and Interval Type. Click Update to save changes.
To cancel a recurring order, click Stop Future Billing.
Processing Recurring Orders
In the AspDotNetStorefront admin console, go to Orders > Recurring Orders. This page will list all recurring orders that are currently active in the system, which can be filtered & sorted using the options at the top of the page.
- Each order can be clicked on to be edited for the recurring setup, or Processed, or cancelled (Stop Future Billing).
- If you want to process all pending recurring orders at once (orders with a Next Ship Date of today or earlier), click Process Charges.
- Each recurring order that was processed will get a new ‘child order’ that can be viewed under Orders > Manage Orders. From that point on, those orders are processed the same way any other order would be. The Parent Order number will display in the Payment Details section on the Order page.


 Email This Article
 Previous Article
 Next Article