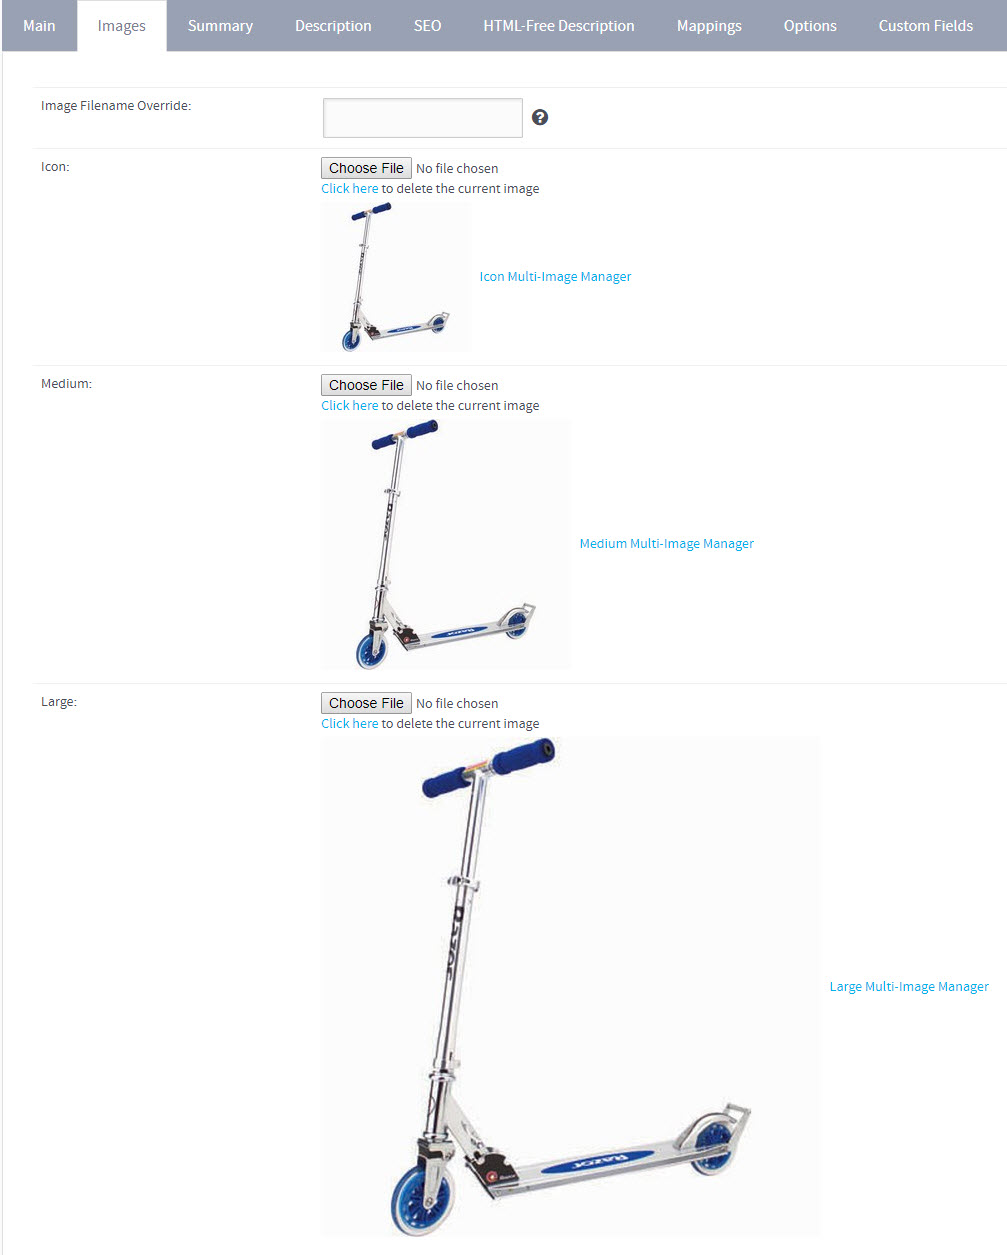
To access the Multi-Image Manager, go to Products > Manage Products in the admin console. Select a product to edit, and click the Images tab.
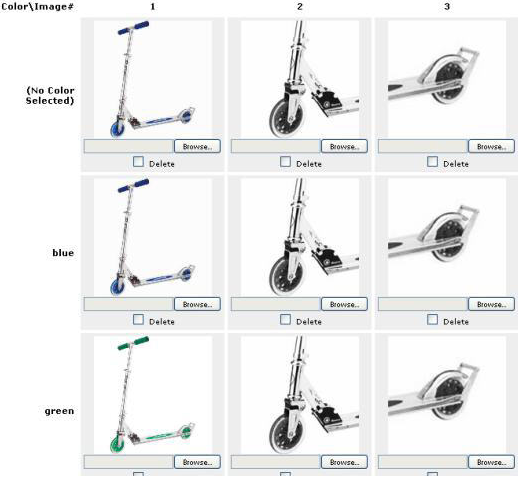
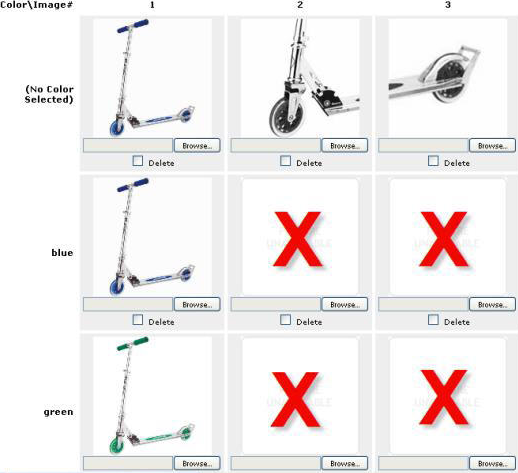
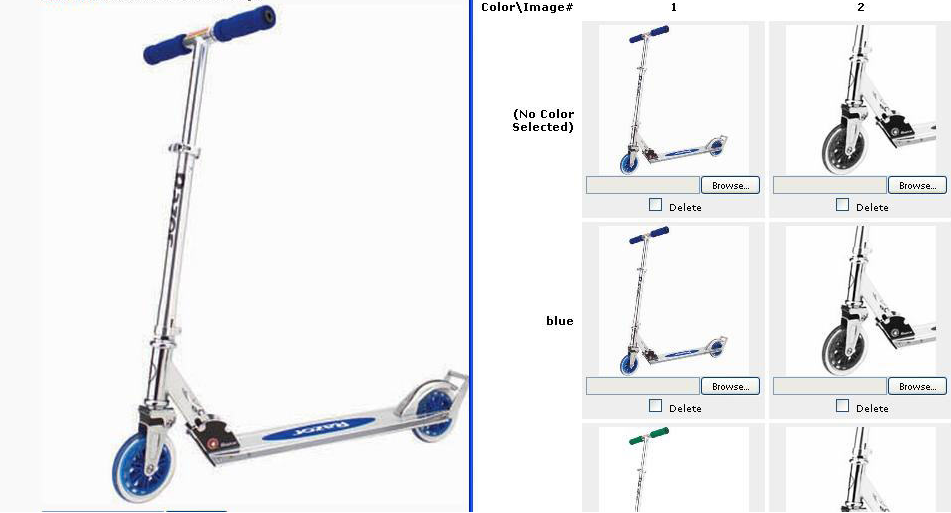
The Multi-Image Manager links in the Product Images tab allow you to upload multiple images, such as alternate views and/or color options. On the storefront product page, customers will be able to cycle through the multiple images. You can have up to nine additional views (and nine for each Color if using variant Color Attributes). The first image in the Multi-Image Manager (column 1) should be the same as the base product image. If you are using variant Color Attributes, there will be a row for each color in addition to the base "No Color Selected" row. If you are not using variant Color Attributes but instead perhaps employ multiple variants as the color options, then you should consider adding the additional color options as alternate images. If you have more than 10 colors, you might consider creating grouped images to enter as alternate views.
NOTE: If the product has the default VARIANT Unpublished, the Multi-Image Manager links will NOT be displayed on the Product Images tab. The Multi-Image Manager is tied to the Variant settings for attribute COLORS.
Image Setup
Dimensions
All of the alternate views and color images need to have the same height and width dimensions. We recommend squared images, and use the built-in image resizing to create the smaller images from the Large image, similar to the base product image setup routine.
Multi-Image Manager
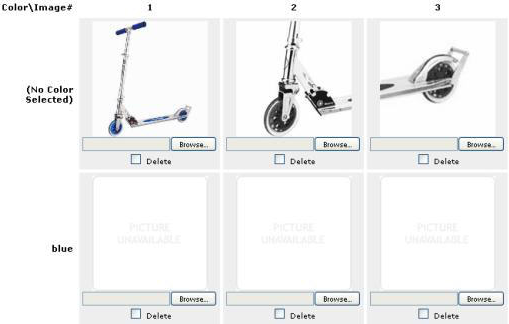
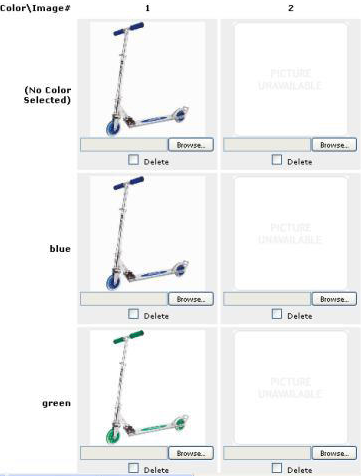
The multi-image manager grid needs to be complete. If the product does not use variant Color Attributes, then you will only have one row (the "No Color Selected" row). See the examples below.
Good Examples:
Bad Example:
Base Product Image
It is best to put the same image in the first view slot as you put for the base product image. If you do not, the customer cannot return back to the base image after selecting an alternate view.
Configuration Settings
There are a few settings that work with the multi images:
MultiMakesMicros : If this is TRUE, then loading images into the Large MultiImage Manager will also create the Micro images (make sure LargeCreatesOthers is TRUE)
UseImagesForMultiNav : If this is TRUE, then the product Micro images are used instead of numbered icons under the main image. Be sure Micro images are created (see MultiMakesMicros) for this to apply
UseRolloverForMultiNav : If this is TRUE, then the medium image will change when "mousing over" the micro image instead of requiring to be clicked. UseImagesForMultiNav Must be TRUE for this to apply
MultiImage.UseProductIconPics : If this is TRUE, then the product Icon images are used under the main image. This will override UseImagesForMultiNav


 Email This Article
 Previous Article
 Next Article