Please read through the entire installation guide and make sure you understand the installation process before you begin an installation on your live site. If there are any steps of this installation process that are unclear, please contact our Help Desk to request assistance.
In order to safely complete this installation on a live website you need to be able to backup your site files and database, and have a plan and permission to restore them should you encounter a problem during the installation process.
This installation process requires a level of technical expertise.
Please ensure that:
You have file access to the root of your website (FTP or RDC are the most common).
You have SuperAdmin Access to your AspDotNetStorefront site.
Simple Installation
This installation package contains a Web directory that contains all of the files necessary to install this package. Please note that it is always a good idea to make a backup of your website before deploying files to your website.
To install the Advanced Product Image Display, follow these directions:
Connect to your AspDotNetStorefront site using your favorite FTP program.
Upload the contents of the bin folder from this package to the bin folder on your website.
Upload the contents of the Scripts folder from this package to your website's Scripts folder.
Upload the contents of the Skin folder to your website's Skin's Css folder. For example: /Skins/Default/Css/
In your site, open the file wwwroot/Skins/{YourSkinFolder}/Views/Shared/_Head.cshtml in an editor. Link to the image viewer css file by adding Url.AppRelativeSkinUrl("css/imageViewer.css"), to the css/bundled group (don't forget the comma at the end).
Upload the contents of the XmlPackages folder from this package to your website's XmlPackages folder.
Log in to the admin console of your site, and navigate to Products > Manage Products.
Select a product, then choose Advanced Product Image Display from the Page Display dropdown, then Save and Close the product editing.
Navigate to the product page on the front end of your website, and add ?install=true to the end of the URL.
For example http://www.yourdomain.com/p-1-my-product.aspx?install=true
Make sure to hit enter or the go button on your navigation bar (This step will create new configuration options documented below).
Back in the admin console, click Refresh Store.
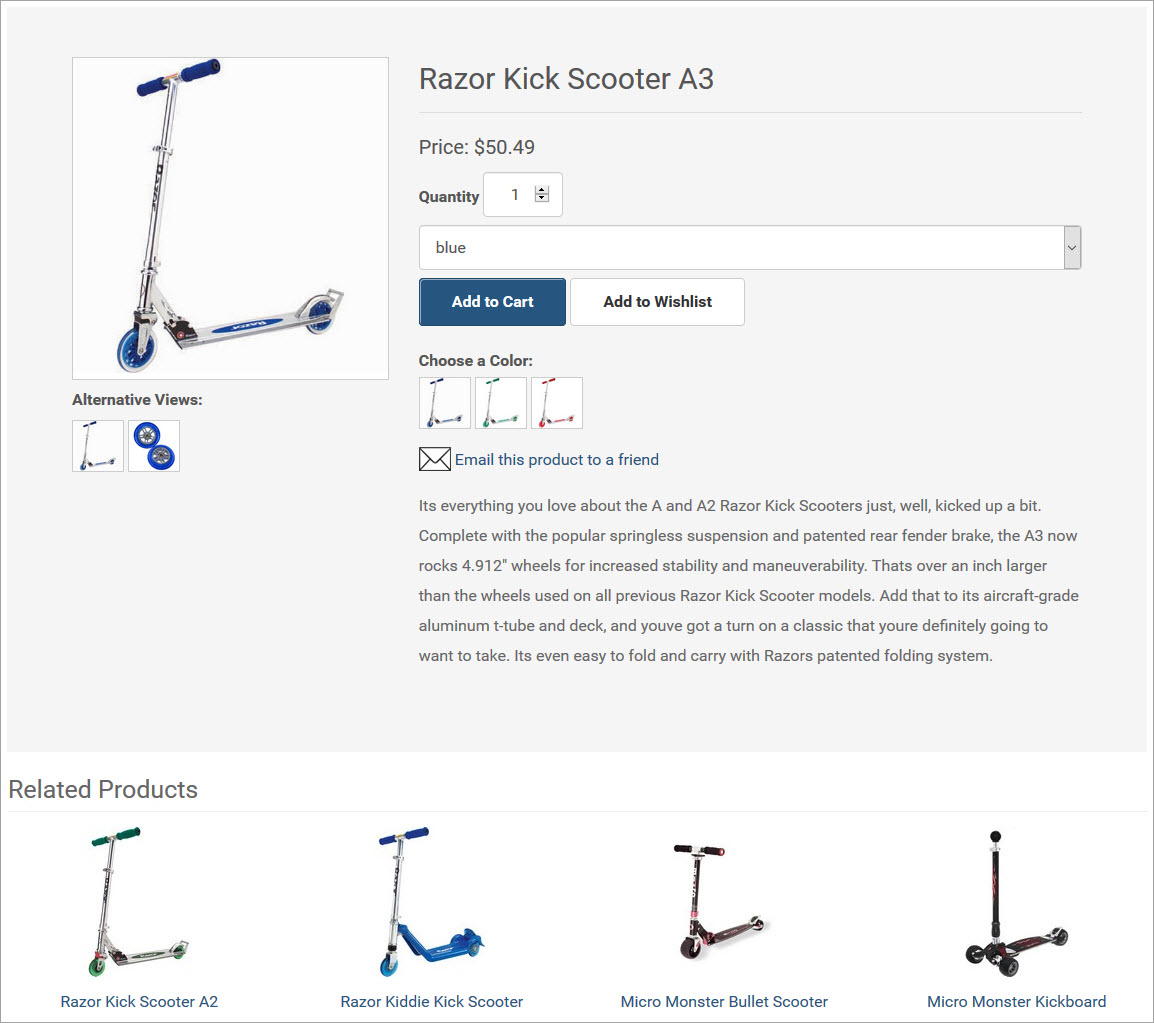
Congratulations! Your installation is complete. Refresh your product page to see the Advanced Product Image Display in action. Use the options section below to configure it just the way you want.
ImageViewer.ViewsLabel:The label text above the view icons.
ImageViewer.ColorsLabel:The label text above the color icons.
ImageViewer.VariantsLabel:The label text above the variant icons if you use variant images instead of product images.
Image Setup
Dimensions
All of the alternate views and color images need to have the same height and width dimensions.
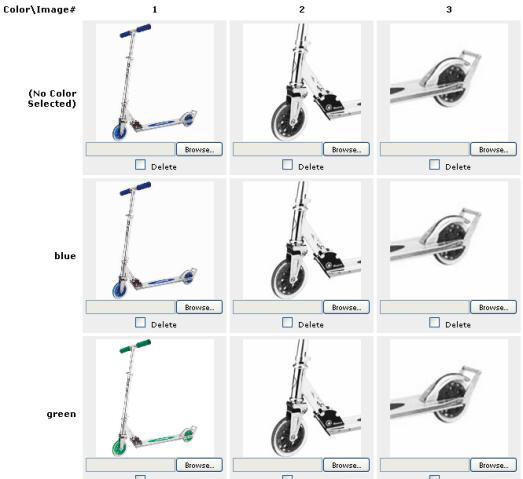
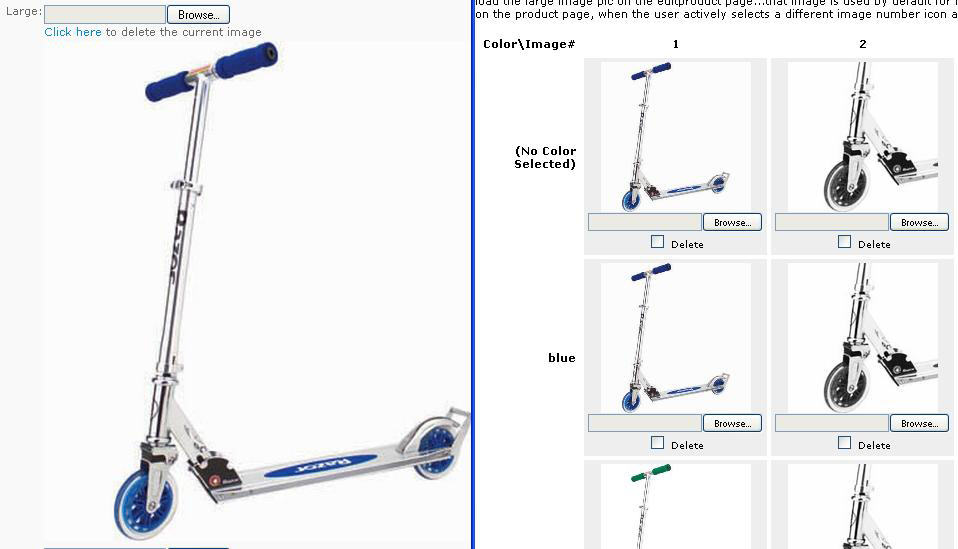
Multi-Image Manager
The multi-image manager grid needs to be complete. See the examples below.
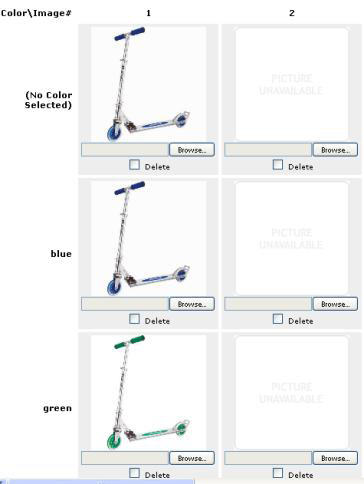
Good Examples:
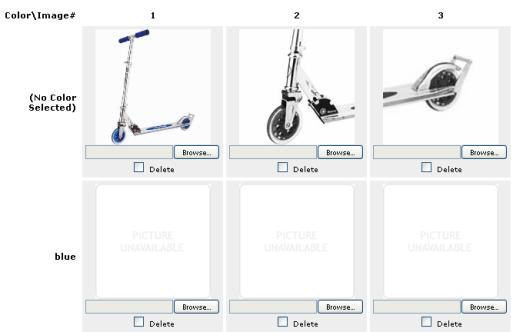
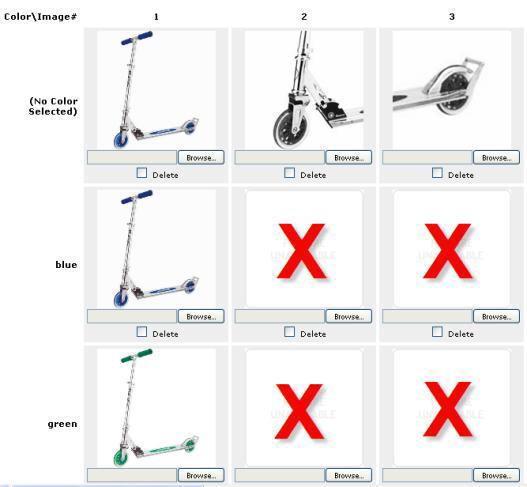
Bad Example:
Default Image
It's best to put the same image in the first view slot as you put for the default image.
Variant Image Setup
It is also possible to setup your product page to display variant images rather than product images. To do this, change the Setting: ImageViewer.UseVariantImages to Yes. Variant images do not support multiple views so they are easier to setup. Simply upload Large, Medium, and Icon images to each of your variants and each will be represented on the product page by its image.
The installation package for the Advanced Product Image Display comes with a product XmlPackage that already includes the
feature. If you already have a custom XmlPackage that you would like to add the
Advanced Product Image Display to, you can follow the instructions below to help you through this process. Please note that this process is much more advanced than the initial installation process and you may want to enlist the help of an AspDotNetStorefront developer if you are unfamiliar with XmlPackages.
Skills Required
XSLT
HTML
Before you get started
Please note that the image viewer and color options should only be displayed once on the product page. The
Advanced Product Image Display was not designed to work with product pages that have multiple add to cart forms.
We recommend making a copy of your original XmlPackage so you can get back to what you started with.
Instructions
Open up the XmlPackage that you would like to add the Advanced Product Image Display to.
NOTE: For KIT PRODUCTS you need to edit the {root}/XmlPackages/page.kitheader.xml.config for steps 2-3 below (the color icons are not valid for Kit Products since they must be single variants with no attributes).
Find the place where the product image is being displayed. There may be several places depending on the XmlPackage. It should look something link this:
That will get you the image viewer and the view images. Now we need to add the color icons to the product page. You can place the code where ever you want on your product page, but we recommend placing it just above your add to cart form.
Test out the modified page to make sure it is working. If you see errors you may need to modify the values of the names of the parameters being passed into the
Advanced Product Image Display to the names of XSLT parameters available in your custom XmlPackage.
If you need to create the Settings, Prompts, and Topics that go along with the Advanced Product Image Display, simply navigate to your product page URL and add the "?install=true" query string.


 Email This Article
 Previous Article
 Next Article